Again, as with every Flutterwave Store update, we start with re-introducing the Flutterwave Store.
Flutterwave Store is quite simply the best and easiest way to launch and manage an e-commerce business that accepts payments from anywhere in the world without creating a website, knowing how to code etc.
Flutterwave Store allows you to upload products, set prices and (in some markets) have our integrated delivery partners pick up when you have an order and deliver to your customer. “Buy Online, Pickup Curbside” store if you like.
Product Discount
Product Discount is a feature that allows you to set a discount/sales price for new or existing products in your store. For instance, if you want to sell a $10 product for $6 this holiday or any other day you choose, it’s now super easy to do this in your store.
To set up a discount or sales when creating a new product:
- Login to your Flutterwave Dashboard, then click “Store” under the “Collect Payments” section of the menu on the left.
- Select “Add Product” in your Store screen and fill the details.
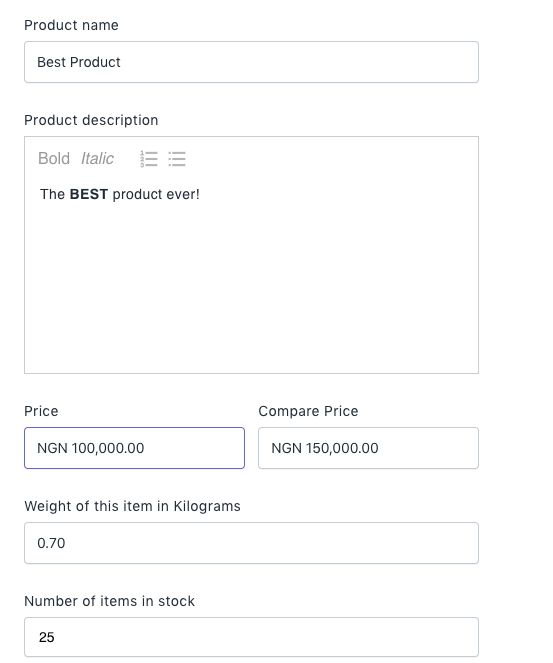
- Add the discounted price to the “Price” field.
- Add the original price to the “Compare Price” field
- Click “Save Product” when you’re done.
That’s it.
To set up a discount or sales on existing products:
- Login to your Flutterwave Dashboard, then click “Store” under the “Collect Payments” section of the menu on the left.
- Select the product from the listed products in your Store screen.
- Click “More Actions” on the top right and select “Edit Product.”
- Add the discounted price to the “Price” field.
- Add the original price to the “Compare Price” field.
- Click “Save Product” when you’re done.
That’s it.

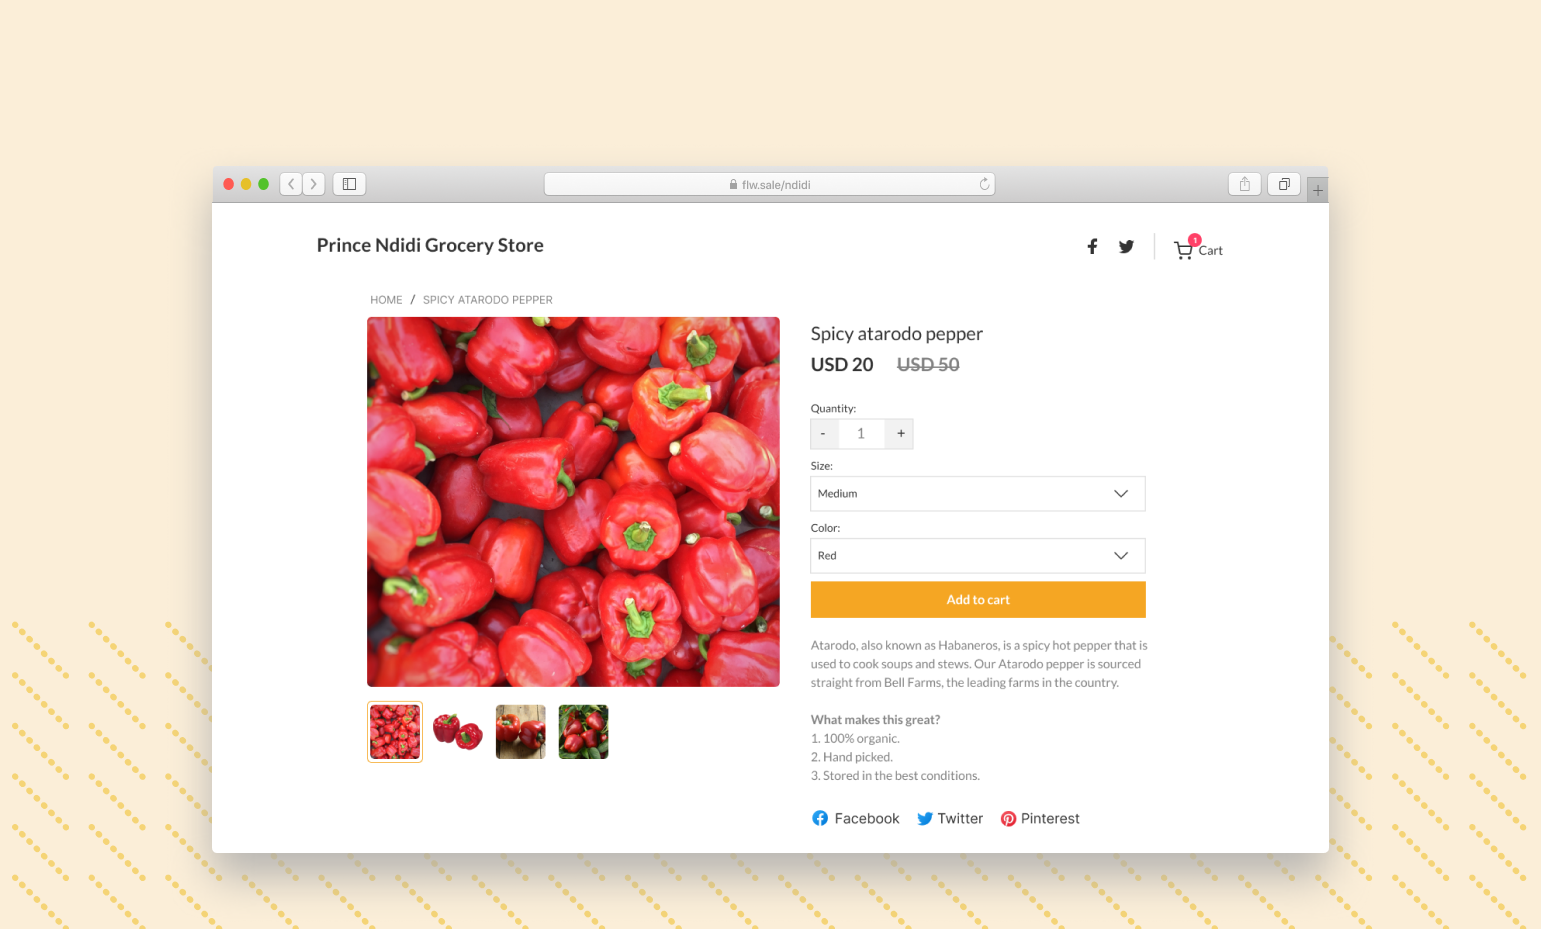
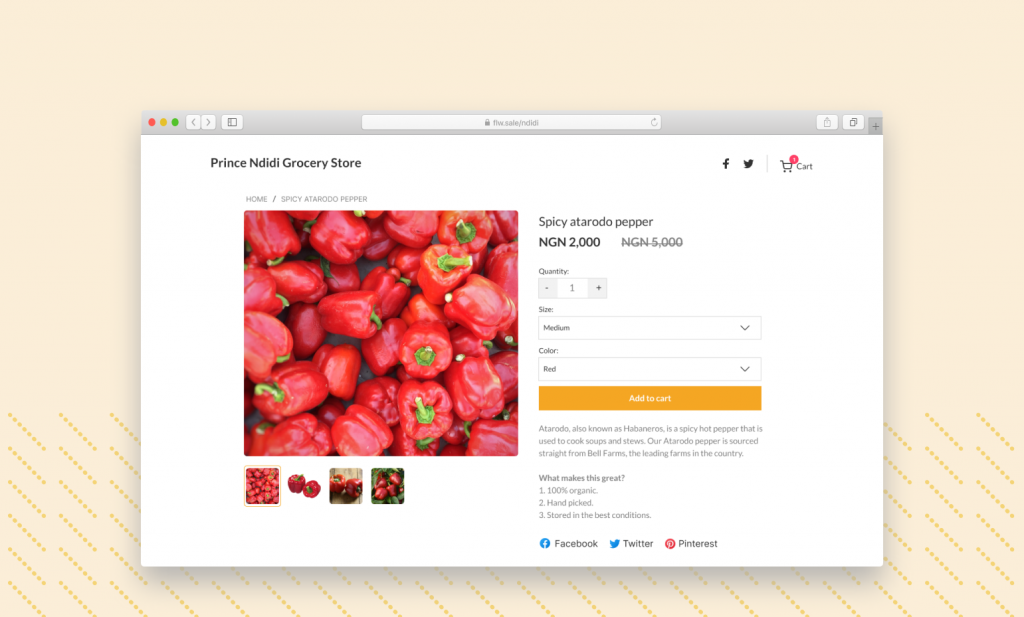
In your store, you’ll see that the price you set in “Compare Price” is struck through with the price you set in “Price” clearly displayed.
Does the discount setting expire after a while?
No. It lasts for as long as the products are available. If your discount is only for a period, consider setting a limited number of products.
What if I have various various options on my product set already?
If you have product variations, follow these extra steps:
- Scroll down to ‘Manage Product Options’ and select ‘View product options’
- Click on ’Set variant prices back to default
- Click ‘Reset’ on the popup window
- Save.
After sales has ended:
- Leave the ‘Compare Price’ field blank, and enter your original price on ‘Price’ field
- Scroll down to ‘Manage Product Options’
- Click on ‘Set variant prices back to default’
- Click ‘Reset’ on the popup window
- Save
Is this feature available everywhere right now?
Yes, it is. It’s available in every region and every currency we support.
So I put the original price in price and that’s it?
No. The original product price goes in the “Compare Price” field. The discounted price you want to sell for goes in the “Price” field.
How do I revert to my regular price when I’m done offering a discount?
Just retake the steps for editing the product and take out the discount price you had added to the “Price” field and click “Save Product.”
What does my customer get charged?
As long as this setting is active, your customer is charged the amount in the “Price” field for the particular product.
Does setting this on one product affect others?
No. It doesn’t apply to all your products, it only applies to the particular product you set.
We’re excited to see you grow customer loyalty with this feature so please don’t hesitate to reach out with any questions or suggestions. Please email [email protected].