WordPress is an online, open source website creation tool written in PHP, it’s known to be the easiest and most powerful blogging and website content management system (or CMS) in existence today, I even testify to that, it’s also the most popular. WordPress can be installed easily on a shared hosting server through click and install. Learn more about WordPress from the official website — whats the website?
Receiving payments online has been made simplified by Flutterwave and it should not be quantum physics. This tutorial will show you how to accept payments online on WordPress by building a simple donation page.
Goal

Prerequisites
Before getting started, you should have a Rave account, WordPress installed (Check how to install here) and a Rave Payment Forms WordPress Plugin (You can download here)
WordPress Setup
You can easily set up WordPress by going to any of these hosting providers Whogohost, Godaddy, Bluehost etc. Login to your Cpanel and search for WordPress in the search bar then click install. Your login details will be sent to your email which will be used to login into your WordPress website.
Setup
Sign up for rave before proceeding. Then, create a page where the donation will be. To create a page you can view this.
This section we will cover the setup of the wp-rave-payment forms which we will use to build the donation page.
1. We will head to the GitHub page of the plugin to download it, click on Clone or download > Download ZIP to download the plugin.
2. After we go to our WordPress admin to install the plugin, Plugins > Add New
 3. We click on Upload Plugin > Choose File > Install Now

4. After that, we activate the plugin.
5. We get a notification to enter our public key to accept payments, click on it.
 6. Open a new tab and go to https://rave.flutterwave.com/stg/dashboard/settings/apis to get your public and secret key.

7. Go back to the Rave Settings on your WordPress admin and fill up the details in our Rave Payment Forms Settings with our public and secret key and other necessary configurations and save changes. The images below show the necessary information needed. Make sure to click on Switch to live account.


Finish Up
We will be finishing up our donation page here. We will go back to our donation page to edit it. We will be using the Flutterwave shortcodes.
Add this shortcode to our page [flw-pay-button custom_currency=’NGN, USD, KES, GBP’].
This shortcode will allow us to accept payment in Naira, Dollars, Kenya Shillings and Pounds.

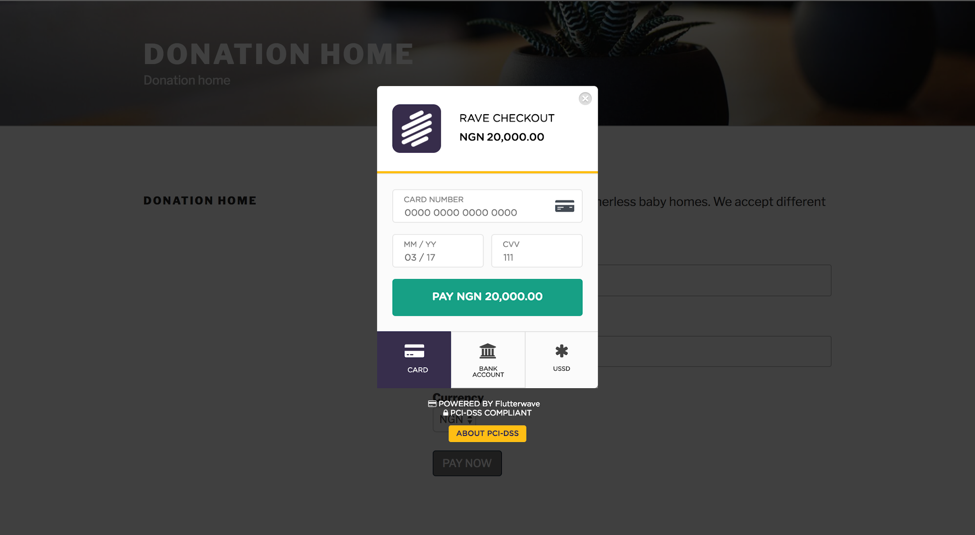
Click on Update, now view the site.

Yes, our donation site is ready. We are ready to accept donations on our WordPress site.

You can view recent donations on your admin page under the rave menu.
Wrapping up
We have built a donations page successfully. The WP-Rave-Payment Form can be used for more than just a donation page, you can visit the github page to see how it can be utilised more. For more suggestions please put it in the comment page. Thanks for reading
— Oluwole Adebiyi (Flamez)]]>